Thursday, March 07, 2013

Eaves


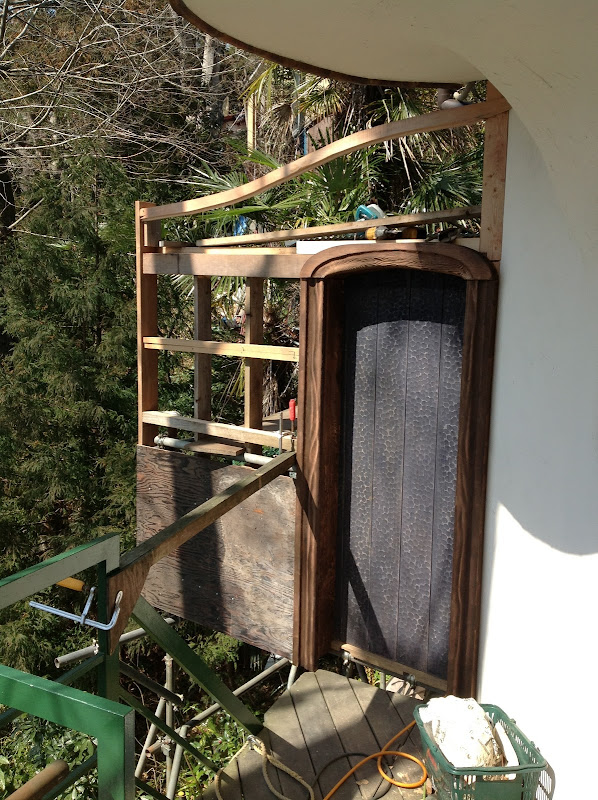
At this point I changed my roof plan a little. I realised when doing little sketches that the eaves would be an issue where they hit the wall. My plan was just to run a strip of roof over the top and handle wherever it hit. But on placing some experimental rafters I noticed that I could make the roof gradually wider on the front face and cover a little vent hood that is concealed by the curve in the wall and also get the shape to nestle into a little cove the wall better.

I forgot to take intermediate shots, so the curved plank that forms the nose at the tip and the rafters have been covered by other timber and I have put on a sheet of tar paper to keep off the rain. I decided to split the eve plank into two tasks rather than try and make it as one piece. So the right hand end is just cut to a straight edge that will butt onto the remaining portion later.

Wednesday, March 06, 2013

Planks


More stud work added above the main beam and another of the roof curve pieces added to the back. 12mm plywood that used to be our utility room floor. The dusty rectangle is where the freezer stood. At this point I decided to leave out the decorative plank that forms the divider between vertical cladding on the upper section and horizontal below.

Leaving out that plank meant I was able to work from behind the wall standing on another informal scaffold plank to cut each of the vertical wall cladding planks. The little gap visible is where the plank will slot in. So I cut the planks to the length plus that gap, then held the planks with their tops poking up above the roof line and traced on the profile to be cut. Pop the plank back in and check for fit, then draw from the back to chop off the excess at the bottom.

Tuesday, March 05, 2013

Door


I tend to use a bare minimum of work scaffolding, I added a triangle of pieces under the structure to rest a plank on, then added more cross timbers and the end piece.

The cross beam has a 2x4 screwed along it back edge which forms an overhang into which the rail for the sliding door is screwed. There is a hole that runs down through the timber and the rail so that the runner heads for the door can be attached and adjusted. I made several copies of the top curve at home to make various parts of the roof. I wasn't sure why I left a nubbin of the end piece sticking up from the roof line, but it ended up forming a tenon that slotted into a nose piece.
The sliding door would not have worked well had I not trued up the scaffolding frame.

Monday, March 04, 2013

Level


I adjusted the level of the scaffolding at the front and put in a floor plate, also added one more lateral timber.

The vertical studs are screwed into the backs of the horizontals with a couple of tiny recesses in the front edges to allow clearance for the scaffolding. The studs are morticed into the big cross beam, which rests on the plate at the corner, it is then held down by a smaller plate cut to the same angles. The cross beam has a shaped arch cut into it for the doorway. There is a small backing timber behind the arch facia piece for the wall planks to be nailed into.

Scaffold true


Initially putting in a plate on the corner of the wall cut at an angle to give a face parallel with the new wall plane (at right). I put in one short scaffolding pole to attach some scaffold brackets that I drilled to hold coach bolts so that I could fix timbers laterally. This picture made me realise that whoever put up the scaffolding did it without regard for level.

Sunday, March 03, 2013

Amille divider


At the end of the terrace of the cafe I renovated in 2011 there is a little utility area strung together with scaffolding and planks. The owners want this partitioned off as it is a little unsightly. My sketch for the work over the next couple of weeks is below.

This will have a sliding door and some better solution to the handrail at the edge of the terrace.